May 2016 - this post has been significantly altered. The promised post for detailed packing in cubes has been written. Go to: "Packing in Cubes..." or click here: http://nana-bs-super-travel-packing-tips.blogspot.com/2016/05/packing-in-cubes-down-and-tidy-part-of.html The whole section of this post covering that subject has been moved to the new post.
-----
CAVEAT: a "true" minimalist would never take some of the things I take on trips and they likely wouldn't have a CPAP machine to be concerned with either, so they would have fewer bags; they still might find useful "cube-packing" information in this post.-----
I suggest that anyone take what is useful to them from this post and ignore the rest, but if you want the best result, it would be best to read the entire post once. Then read "Packing in Cubes...." http://nana-bs-super-travel-packing-tips.blogspot.com/2016/05/packing-in-cubes-down-and-tidy-part-of.html.
-----
In beginning this conversation, it is appropriate to note that I am a very good "packer" and have always used all the corners and spaces in my bag. I fit in much more than many people in a very organized way, so I thought using cubes would leave unused spaces and significantly reduce what I could fit in--I was wrong! I fit even more into the case because I use cubes for compression and still fill the spaces.
Despite my uncertainty, I was very interested in the idea of being able to organize everything to make long trips easier to prepare for, maintain, and recover from. Eventually I began to experiment with cubes, and I am now a total convert for every kind of trip. I have refined and re-refined. My system works very well now, and as I learn more and new products are being introduced, I will continue the refinement process.
One compelling aspect is that I can leave home with a beautifully packed and organized case/luggage ('case') with no cubes, but if I am going to more than one destination, a re-packing job will be required each time I move to the next place. Then when I'm ready to go home, re-packing will be a very big job if I've been "living somewhere" for a month. That is exhausting and time-consuming, and I had no idea how easily it could be overcome. If there were no other reason to perfect my "cube-packing", this alone would be sufficient. Re-packing is now so very simple and quick!
The full realization that one could STAY organized (and partly ready to go) the entire time was something that grew as I perfected the system.
One important part of the puzzle came from earlier use of the Eagle Creek Packing Folders® for business trips. They do a remarkable job of keeping suits, pants, shirts, etc., looking their very best. I still have them, but I only use them if a special occasion absolutely requires it because they are not as flexible to pack nor as versatile. The reason I mention this is because I will later explain how to "compress" using cubes (please see, "Packing in Cubes..." http://nana-bs-super-travel-packing-tips.blogspot.com/2016/05/packing-in-cubes-down-and-tidy-part-of.html. This lesson I really learned from using the folders, which do an amazing job of compression.
I have now used cubes for everything from overnight, two-night trips, a week, three weeks in this country in a car moving about from place to place; a month in one place; six weeks in Europe, moving about and staying in one place from 1 day to 3 weeks and moving about at other times, etc.
Another important note is that doing some of the things I have recommended may seem like a lot of effort to some people. The truth is that once learned, the whole process goes very smoothly and quickly. Folding properly, compressing, etc., takes only seconds and becomes second nature.
Cube Size Definitions:
First, I will describe Eagle Creek's (EC) cube size "definition" followed by my own way of describing them.
For photos: http://shop.eaglecreek.com/packing-cubes/l/212
EC "double cube" - other companies and me "Large" --
This is the size that I do not use because, in my opinion it defeats the purpose of cubes. You end up with stacks in it side by side--so it becomes nothing less than a mini-case.
- You can see the side by side stacks in this cube:
- If I had a garment so delicate or crucial to pack that I did not want in a regular cube, I would use one of my Eagle Creek Packing Folders®. (Examples: suits, long dresses, etc.)
- 15-inch size - http://www.amazon.com/Eagle-Creek-Travel-Pack-It-Pacific/dp/B002YIPBCI/ref=sr_1_4?ie=UTF8&qid=1378063294&sr=8-4&keywords
- 18-inch size - http://www.amazon.com/Eagle-Creek-Travel-Pack-It-Pacific/dp/B002YIPBL4/ref=sr_1_5?ie=UTF8&qid=1378063294&sr=8-5&keywords=eagle+creek+pack-it+folder
- 20-inch size - http://www.amazon.com/Eagle-Creek-Travel-Pack-It-Pacific/dp/B002YIPBV4/ref=sr_1_2?ie=UTF8&qid=1378063294&sr=8-2&keywords=eagle+creek+pack-it+folder

- By necessity, using the folders will make use of the case space less efficient. They are larger, the corners "stick out", and the sides do not form "square spaces" which one can fill in.
EC "half cube" - me "Small"

Eagle Creek (and others) make a variety of other cube shapes and sizes. I consider whether they might be useful, but so far have not found a use for some of the others (partly because I have accumulated a number of other mesh bags over the years).

In addition, I have a set from Target which is pretty useful; I was saving money and 'trying them'. It has one regular and a small.
- You could save money using these. They have reinforcing plastic cord piping inside the edge which I do not find necessary.
- The reinforcing piping is somewhat inhibiting when cramming a cube into a space which is slightly too small--another technique I use successfully.
- Once I get to a long-term destination, I remove the boots and use the cube for a "laundry tote" or "kitchen items" if desirable.
- For overseas trips, I do not put my boots or shoes into a cube--I can squeeze more of everything into the bag if I do not do that as the space becomes more flexible.
- You can fill the spare spaces inside the cube around the boots/shoes.
- You then need sufficient space to put the stuffed larger cube into the case.
- For me, the Eagle Creek shoe bag style is not as desirable.
- It comes in two sizes.
- The eBags one is a bit better, but I really like the one I got at Target.
- Target bag photo coming when available
- Hint: earrings, necklaces, etc., go in their own tiny plastic ziploc bags to keep them from getting tangled.
- Jewelry often comes in those little ziploc bags.
- To keep earrings tidy, I usually attach them to small earring "cards" as sold in the stores.
- http://www.amazon.com/Travelon-Packing-Squares-Set-Black/dp/B003JFBQRO/ref=sr_1_27?ie=UTF8&qid=1377893848&sr=8-27&keywords=mesh+packing+cubes
- The only drawback to these are that they do not open fully up--they have a fabric gusset which prevents it, but they are still useful cubes.


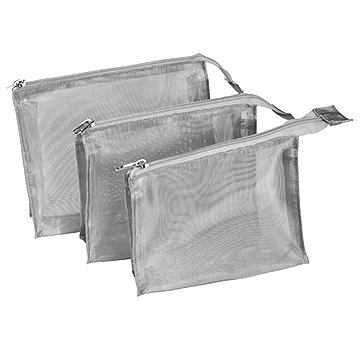
I have also added a set of little mesh zippered bags for such things as keeping charger cords from getting tangled and spilling out all over, etc.
- These are not my "ideal", but they are working at the moment and help me keep my world more efficient and organized.
- I don't like the cross-zipper style
- They are cheaper than the stiffer mesh "envelope-style".
- They are very soft (unlike my stiff mesh envelope bags) so several can be readily stuffed into a small case pocket trapping awkward things like cords and chargers.

- (photo to come)
If, at this point, you think I have a bag "obsession", you may join a very long line of people who would agree!
- It works really well for me.
- I invite you to use what is useful to you from this post.
- As in cases, I only want a cube that zips at the top of the bag AND around three sides so the lid can "lay nearly flat" behind when open.
- I see other designs--I know what I will work with, and this system is for me!
- I like the design typical of many--light weight tough fabric with a little strength to it so it stands up a little on its own. (Some are "floppier".)
- It must also have some mesh on the top so I can see my stuff, and ideally one end will be mesh as well (not critical).
- General image of a "cube" type bag:
- .
- I selected several different fabrics, so on large trips I know my jamies are always in the "red one", tops in the "blue", or whatever. This makes finding stuff SO very easy!
Trip Planning:
I have been asked to describe how I use packing cubes and what might be a typical number of cubes and the sizes I use for various trips (shown below), but first I will describe my system of layering.
- The separate post, "Packing in Cubes..." http://nana-bs-super-travel-packing-tips.blogspot.com/2016/05/packing-in-cubes-down-and-tidy-part-of.html has a detailed listing of my 2016 trip.
- If I didn't use a layering system, my clothing would exceed my self-imposed bag requirements frequently.
- One can still vary outfits in all sorts of cute ways.
- A couple of "modesty tops" take up no space and no weight and with the right jewelry can dress up the plainest of tops and bottoms.
- Required in cathedrals, etc., in some countries if you are wearing a tank top, sundress, etc.
- Otherwise, they will give you a little paper "cape" to wear and be rather annoyed that you do not know how to dress with respect for your surroundings.
- A couple of very thin scarves (the bigger size, for a wrap) can also be tied in multiple ways and function not only as a fashion statement, but also fend off cool air. They take up very little space and add very little weight.
- An added benefit of these is some are so small they tuck into the bottom of a purse in case it gets cool.
- Jewelry types -- "plainer" for sightseeing; "fancier" for dress-up
- I find it a bit trickier to "dress-up" the outer wear I take, unless it is warm enough for just a scarf. I have no intention of taking two types of coats on airplane trips. I usually put on whatever I need to keep warm; when I arrive, I take those things off, and throw a scarf or something around my shoulders.
- Tank Tops (or short sleeve tops)
- If you are a short sleeve only kind of person, please substitute short sleeve top wherever I have mentioned tank tops.
- I am the kind of person who gets too hot in short sleeves in summer. But in our mild winters I layer them with long sleeve shirts.
- Either functions as a great under-layer when it's cool.
- Shirts: Soft, Extremely Thin (hard to find) long sleeve button shirts
- Use for sun cover up, eating outside in the evenings, great for air-conditioned spaces, and comfy under a thin merino sweater, as well as under a fleece or puffer jacket.
- I found mine at Target a long time ago--they didn't have them very long. I continue to look in every kind of store for them (from high-end on down). If I find one, I buy it because they are so rare. (In 2016, I have actually found two that are fairly close; I'm hopeful they are coming back "in".)
- They are always made of incredibly soft, thin cotton in places like Indonesia, Pakistan, Turkey, etc.; possibly using labor practices I would not like to support, but I have diligently tried to find the fabric to make them and have been entirely unsuccessful.
- All other long sleeve shirts are significantly thicker fabric and don't work as well for me.
- Mine can be steam-pressed in a few minutes if I need to look nicer. Usually I put them in the dryer for 6 minutes on med-high and hang them to dry and do not iron them.
- They are so thin that on trips they dry quickly; I prefer not to dry them in the dryer completely to reduce the wrinkling, but it can be done in an emergency. I always put them in the dryer once when they are brand new to precipitate any shrinkage.
- Proper folding and smoothing creates an almost-ironed look with this thin fabric.
- Before I found any of these very thin ones, I used the awesome Brooks Brothers® non-iron shirts. I still have them, I still wear them, and I still love them.
- They are the most professional-looking amazing "finished shirts" and very comfortable.
- In the dryer six minutes, hang to dry, and they look freshly ironed all the time!
- Perfect over a tank, short, or thin long sleeve top, under a merino or cashmere sweater, under a blazer or vest -- incredibly flexible!
- Not very thin, so I do not wear them in hot weather or as a "sun shirt".
- I pack them in non-summer, but in 2016 I'll wear one on the plane. It will be great for "touristing"!
- Bottoms: A combination of long pants and capris, or capris and shorts, or all three (depending on weather), plus skirts as noted:
- I don't wear skirts much, but usually throw in one longish (black) knit one for emergencies.
- And for extreme heat, some of the capris/shorts are augmented by extremely thin flouncy cotton skirts.
- I only pack ones which are not too flouncy or bulky--ones that flatten out quite small.
- Example: the ONLY thing I could stand in Venice in July.
- Travel fabrics mostly preferred for bottoms
- Even though I vastly prefer natural fibers, for travelling travel fabrics are extremely useful. Lightweight, quick-drying, and they shred wrinkles fast.
- I have continued to take a pair of blue jeans (just in case).
- They are heavy, hot, and bulky, and unless it's true winter I won't bother again.
- NEVER AGAIN will I wash blue jeans in the bathtub and wait for four days for them to dry because Switzerland does not have laundromats!
- Too late, I learned there are sometimes washers and dryers in campgrounds--who would have thought no city has them??? Does EVERY apartment building have them?
- Blue jeans just stay in my case. weighing it down and taking up space.
- In 2016, NO jeans. Finally found acceptable travel pants. I'll miss them.
- Cover-ups:
- A THIN merino sweater to layer over a tank top and a long sleeve shirt if needed to look nice (instead of fleece or down), or just to add another layer under my outer layers.
- Fleece Hoody (unless not required--no longer required for most trips with merino and down)
- One of the extremely light weight short down or synthetic jackets that comes in it's own stuff sack (except for exclusively hot climates) [See Special Tips below.]
- For all but the very coldest weather, use with any combination of the following, or ALL of them: tank top, long sleeve shirt, thin merino sweater, down jacket, and top with the Houdini--pretty amazing!
- Incredibly useful if cool and windy--then all I might need is the tank top, shirt, and the puffy jacket; if very cool and/or windy, top with the Houdini.
- Always the Houdini (see "Awesome Hint" below)
- Even in summer, a puffy down Calvin Klein (either short or longer coat) and the Houdini are required if visiting high mountains, high desert, San Francisco, Northern Europe, etc..
- I also always take my CK sleeveless vest to layer with any or all of the above. [See Special Tips below.]
- A truly waterproof, breathable jacket with hood (Gortex-type). [See Special Tips below.]
- They are much heavier and bulkier than a Houdini, so for me to use one of those now, I would likely be sightseeing or hiking in consistent rain.
- For running in and out of stores, etc. the Houdini is all I will use, even in downpours.
- I now own a longer puffer jacket (also Calvin Klein, also from Costco) with a hood, which zips into it's own pouch and takes up almost no more space/weight than the shorter, hoodless one. This is my new travel coat for cold weather except in deep cold. [See Special Tips below.]
- Even then, I intend to layer it up to it's full extent; I believe it might be good for short periods down to zero degrees F when covered with my breathable raincoat to cut the wind. Have to test that one.
Special Tips:
- Awesome Hint:
- I use an amazing wind and water-repellent cover-up--so tiny you'd never believe it and beautifully designed. Rip-stop nylon. It stuffs into it's own (maybe 7" x 3") pocket and weighs 4 ounces--it can be with you all the time!
- The stuffing is really "cramming bit by bit" like putting a sleeping bag into a stuff-sack only more carefully. Care should be taken when closing the zipper so as not to catch the fine fabric.
- The hood design is incredibly effective (and I design clothing, so I'm well aware). It has no strings or pull cords, and yet it stays on my head in pretty high wind. It has a nifty adjustment on the back of the head for people who have small heads (but fortunately fits my extra-size one well! I can also put a knitted cap under it.)
- My daughter has the "women's" version (I got the men's because I wear sweaters, puffy jackets, all sorts under it).
- Houdini ®, by Patagonia
- don't forget to select a jacket in a color that can be easily located if you are lost in the woods or mountains (red, yellow, etc.)
- Blacks, grays, tree-colored greens, darkish purple, etc., are really poor options, though most people seem to prefer them because they don't like "loud colors".
- Please trust me, if you are lost in the woods you want LOUD!!! I wanted a red/orange one, but I'm waiting for a sale.
- They have re-located the pocket since I got mine.


- Another Amazing Hint:
- I have a very light weight short puffy down jacket with it's own stuff sack. (I don't know how I did without this either--I'll never travel without one of these versions again!)
- Mine is a Calvin Klein (from Costco).
- If you want the best, get a Patagonia (theirs is a synthetic fill, less thick so packs way down, perhaps as warm, and quite expensive).
- Puffer jacket by Calvin Klein
- mine:

- Both both just ounces and mash really flat.

- As mentioned above, I now also have the same CK jacket, but longer and with a hood--most amazing two jackets I've ever owned! Will always take one or the other of them. (It is longer than it looks here.)

- In addition, I have the CK sleeveless vest of the same ilk--positively LIVE in it much of the time!
- It goes EVERYWHERE all the time! I will take it as well as the longer hooded CK coat because I can layer them for warmth in the mountains and because I will wear it all the time everywhere.

- Waterproof, breathable rain and wind jacket:
- They come in regular length (and I have that kind, too), but I got a longer length. When needed, I can layer this one over sweaters, down vest, and longer down coat and be about as warm and 'out of the wind' as big heavy winter coats can achieve (perhaps not at Tahoe in deep winter).
- I got rid of my heavy winter coats when I got this because it's rarely as cold as 30 degrees here.
- I bought it LARGER so I could fit it over any or all of the above and still put it in my daypack for use if it rains. (It will be great for walking the streets of any large city seeing the sights all day.)


- While I am passing out hints, there are some other incredibly useful items which stuff into tiny spaces:
- Duffel rePETe® by Chico - a stuff-in- it's-own pocket, nylon duffle bag which is strong enough to go be checked luggage if you have too many treasures to fit in your cases.
- When stuffed in it's pocket it is about as big as your hand opened wide, about as thick, and very squashable. It has been used as checked luggage successfully.
- Paying for an extra bag is significantly cheaper than shipping!
- Ultra-Sil® Day Pack®, by Sea-to-Summit - the world's tiniest, incredibly tough, backpack that folds up it's own little pouch and takes up almost no space at all. (not cheap)
- May be used in lieu of a purse, shopping bag, and on day hikes.
- My daughter put TWO full-sized basketballs into one; I still don't know how she did it! See how TINY it stuffs into it's own little sack; 2.4 oz.; 20 liter volume, Siliconized Cordura. Very amazing and incredibly useful. When I first saw it I thought I would never use it--now I never travel without it. I thought the fabric straps would cut into my shoulders and they haven't. It fits into the palm of your hand when stuffed.
- It goes into my case even when I'm taking my daypack. On arrival it will go into my purse--useful for groceries and other shopping.
- It often gets used by other people who don't take theirs along!

- Three boots inside; I could have put the fourth one in.

- Ultra-Sil® Duffle®, by Sea-to-Summit, 40 liters - the world's tiniest Duffle, incredibly tough, medium size duffle that folds up into it's own pouch and fit into the palm of your hand. (Again, not cheap, but worth every penny.)
- Goes into the suitcase everytime!
- Stuffs down to slighter bigger than the daypack. (Get a different color so you know which is which--someone borrowed my red one and never returned it.)

- With four boots, puffy coat, several other things, and no where near full:

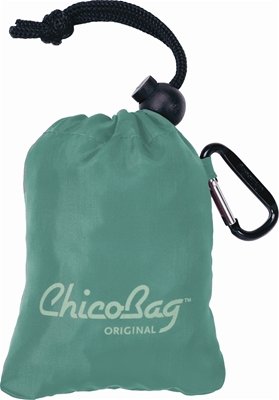
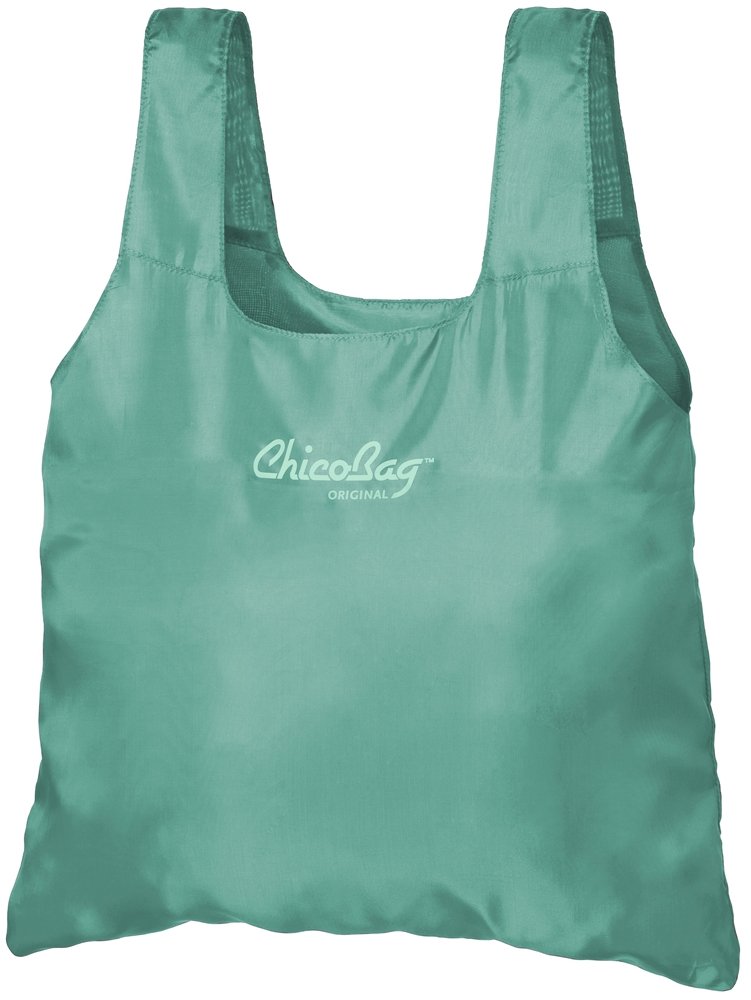
- Our family never leaves home without reusable shopping bags (mostly by Chico) which come in many styles, sizes, and shapes.
- Just throw them into the washing machine with your clothes--they dry very fast. No need to put into the dryer.
- ChicoBag Original® version shown--there are many sizes, styles, strap lengths, and fabrics. (They also make a really cute purse--maybe it's called Hobo rePETe.)
- On trips, I take 3 bags to sort laundry into: whites, mediums, and darks.
- I have trained my husband to put his clothes in them, too, so laundry time is simple.
- I also take 3 others to use for grocery and gift shopping.
- We now have a few new, smaller, extremely light weight ones from Chico which are made of ripstop.
- More expensive, but very useful, and they stuff into their own pouch, too--ending up so tiny (the size of a golf ball or smaller).
- ChicoBag Micro®
- tiny (most people probably don't need a bigger one, but we often prepare breakfast and lunch, so perhaps buy more food at once)

- 3-4 boots inside:

Please see "Packing in Cubes..." http://nana-bs-super-travel-packing-tips.blogspot.com/2016/05/packing-in-cubes-down-and-tidy-part-of.html for details.
General info: I use various combinations of the cube and non-cube styles as required for each trip.
- The "tiny" kind I pictured above (one for my jewelry) fits between the rails in the bottom of the case.
- Another important thing also fits between those rails: my new tiny fabric face mask for my CPAP in it's envelope-style mesh bag (about the size of a checkbook).
- Another somewhat bigger envelope-style one goes in the between-the-rail space with an easily compressible swimming suit, nose plug, and ear plugs.
- The Chico Repete duffle described above fits between the rails, then smashes down.
- Any number of my reusable shopping bags also fit between those rails.
- A small mesh bag with first-aid supplies and meds fits either in the bottom between the rails, or pushed down the side, or in between the cubes when the cubes are stacked in the main compartment. I will put a photo of mine on here later, but these are a little bit like it.
- And, of course, the various chargers and cables, extra camera cards, etc. are in their own bags (grouped in categories) in the outer pocket.
Day Trips:
- A small cube for my zip-down-the-front, hooded fleece--fits perfectly
- Where we live there are many micro-climates; it may be 90 degrees at home and 60 degrees at our destination with a strong wind, so one never leaves home without layers.
- Keeping my fleece in a small cube means that my backpack or day bag isn't going to vomit fleeces, sweaters, etc. whenever I want to retrieve something from it.
- I leave my fleece in the cube at home so all I have to do is grab-and-go.
- Update May 2016. Now that I have my lightweight puffy down items (a sleeveless vest, a short coat with no hood, and a longer hooded coat), I no longer carry my fleece about.
- A very thin merino sweater and any of the down things make a very lightweight and effective combination. It is even more flexible than my fleece (or hooded sweat jacket), which I still dearly love.
- 1 regular cube (in the case with my CPAP machine).
- I put jamies, tops, and bottoms, a sweater, and maybe a pair of shoes in this cube.
- My case has exterior pockets, so undies, socks, and toiletries go into those.
- The top pocket on the outside is where I ALWAYS put charger cords, camera cards, etc., for quick retrieval on any trip.
- I can also put undies and socks in a small cube, if needed. But they fit into the regular cube very nicely.
One Week Trips: a 22-in. case, and one of the smaller ones for my CPAP, etc., plus a tote or backpack
I don't do many one-week trips, (except for skications), so it depends very much on the weather and the activities anticipated. This is a potential scenario:
- 2-3 regular cubes
- Cube for tops and jamies
- Cube for bottoms (pants, skirts, capris, shorts) and cover-up (sweater, scarf, etc.)
- The reason for the 3rd cube is that an empty one folded flat in your case, can be very useful once you begin travelling.
- Dirty laundry is one option for it's use, and it won't take up any space or weight on the way there.
- 1 small cube
- Undies and socks
Two Week Trips: a 22-in. case, and one of the smaller ones for my CPAP, etc., plus a tote or backpack
- For a two week trip I would repeat the one week trip configuration, but would likely end up with 3 regular cubes.
- If it's winter, this could mean an additional case, but more likely one of the larger ones I use for my CPAP.
Three-Six Weeks, or more: two 22-in. bags (checked luggage) plus one of the smaller bags for my CPAP, plus a backpack.
- Please see "Packing in Cubes..." for the details of just such a trip as this: ______
Actual number of cubes depends on weather to be covered and acitvities involved; we often travel in multiple climates doing everything from hiking to attending parties; for six weeks I would use the larger number in each case)
- 3-4 regular cubes
- Cube for tops
- Cube for bottoms
- Cube for jamies, sweaters, etc.
- The 4th cube is to have an empty one as explained before.
- When I haven't taken an empty one, I have wished I had one.
- Some of my trips are to an almost "fixed location" for an extended period and I fly, so packing is critical.
- When I get there I need to completely re-organize many things to cook, etc., so I often take along one cube of some shape to use for trips to the laundry, capture kitchen items, etc.
- It's an easy way to take along detergent, a few clothes pins, a bit of stretchy clothes line, etc. And they stay organized when not needed.
- On the journey I might use the cube for a good kitchen knife, some tea bags, and a few other things I do not want to have to purchase when I arrive, as well as some nutritional supplements, etc.
- 1 small cube
- Cube for undies, and socks
- Socks may go into a small outer pocket of some case.
- Shoe cube for lightweight walking boots -- all special walking socks are stuffed into and around the boots. Or not, depending on packing configuration.
Luggage Options:
There is an upper limit to the number and size of luggage pieces I will travel with on any trip and my scenario works for 3-6 weeks (as above) and potentially around the world for any length of time.
- If it were truly around the world I would have all expansion areas expanded when leaving home.
- If it were many months long, I would take two (instead of only one) of the Sea-to-Summit Duffles in my case for treasures and gifts. (And leave the Chico one at home.)
One of my "rules" is that I will not travel with more than I personally can deal with when there is a need to run through an airport, etc.--except for the flight home if it cannot be avoided. (Please see "Maximum case scenario" below.)
Many of my trips involve travelling with our extended family, so using smaller cases is crucial.
- European cars and smaller American ones do not accommodate gigantic bags very well--you certainly cannot cram a whole bunch for an entire family in them.
- Smaller cases provide much more flexiblilty when stuffing into vehicles!
- Larger cases hold far more than the airlines allow without charging extra--in fact I am quite capable of stuffing more than allowed into a 22-inch case.
Case Choice: I will only buy cases which zip open at the TOP of the lid, not below the expansion area.
- Many cases have the main zipper BELOW the expansion area.
- This leaves you with stuff balancing in the wind, so to speak (even if it's "strapped down", while you are trying to pack, compress, and close the case.
- "Living out of one's case" is a total nightmare when clothing is stacked 9-10" deep in a case without even a "side" for the top 3 inches, total confirmation that using cubes makes travelling better.
- The only luggage I will buy is this configuration (this is not my case, nor my brand)
- If you look closely, you will see the expansion zipper is BELOW the "lid" zipper; often they are above the "lid" zipper.
- When this case is open, ALL of the packing space is in the lower part of the bag -- none is above the top line of the case
- Cannot currently locate a photo for the kind I will not buy; it appears the more manufacturers may have finally figured out where the zipper needs to be!
- It takes a bit more effort to shop for, but I refuse to purchase a bag that makes it harder to pack and keep my things organized.


- I consider it a job well done if I can keep all my expansion areas zipped closed when beginning a journey--on the way home I unzip and pack my treasures!
- I might have to break this rule to get my trekking poles in, but I try to convince my husband to put them into his 24-inch case.
- He has disassembled them to see if they will fit into a 22-inch one; I don't think so.
- For the same reason, I try to keep the weight 8-10 pounds under the limit in each of my checked cases to allow for flexibility on the way home.
- Sumary - my limit is (see details and images below):
- Two 22-in. wheeled cases
- A smaller wheeled case "piggy-backed" to one of the 22-inch cases (as a tag-along)
- My backpack (or tote) riding on the other case.
Details:
- Two-each, 22-inch cases (checked luggage)
- Most people use larger cases, but I can put enough in this size to exceed airline weight allowances.
- When I used bigger cases I was sometimes "over the limit"
- And I couldn't lift my case to put it in a trunk.
- Try putting a 54-pound case over the deep lip of some rental cars!
- This exceeds current weight limitations for most travelers and most classes of tickets.
- When I leave for a trip I plan to NOT unzip the expansion portion of either case if at all possible--that way I have plenty of space for bringing home gifts and treasures.
- This gigantic case is configured rather like mine (mine has the expansion part in the correct place)
- In fairness to the seller, I provide the link, although this is a 29-in. case and I would never use this size. http://www.ebags.com/product/travelers-choice/lightweight-29-exp-rolling-suitcase/233456?productid=10188305

- One OR the other of the following options
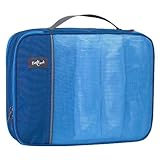
- If in a car, one 16-in. IT case which carries my CPAP and whatever else I may need.
- OR the 20-in. IT case
- OR Eagle Creek Lync® 22-inch case, which isn't a "full 22-inch size case".
- This bag used to be a heavier 18-inch case as my "overhead bin" bag with full-sized laptop, but I have real problems lifting 35 pounds up over my head.
- In a car trip, I can fit everything listed in the next entry, plus (in the summer at least) everything I need for sleeping five nights on the road in cubes, slightly squashed)
- It also holds a full-sized laptop computer when needed.
- The bag I used to use irreplaceable; I have been checking for years and have almost never seen anything sufficiently similar to purchase--they are all larger. [But now I use one of the lighter weight versions above.}
- I even wrote the manufacturer to suggest they bring it back and market it as a bag for CPAP owners, but so far nothing has materialized.
- It looks much like the larger cases, I refer you to the image in the post above.
- If on a plane, one IT Luggage IT-0-1 Second Generation World's Lightest 2-Wheeled 16" Carry On® OR the 20" version of the same case OR the Eagle Creek Lync® 22-inch case case
- for my CPAP, electronics devices (micro or laptop computer), two pairs undies, a thin nightie to sleep in when they lose my bag, one top and "sample sizes" of shampoo, bath gel, deodorant, toothpaste, toothbrush, etc..
- This case goes into the overhead bin on the plane; it does not weigh too much, so I can actually lift it up and put it in the bin.
- Last time it weighed 18 pounds.
- Both IT cases are not only shorter, but narrower, and less deep, so you can't put so much in there that you can't lift it.
- This is not exactly my bag (can't capture Amazon image). This is a larger bag--mine has 3 small zippered compartments on the top, see Amazon link below for my actual bag.
- http://www.amazon.com/IT-Luggage-Generation-Lightest-2-Wheeled/dp/B006CS5ICY/ref=sr_1_1?s=apparel&ie=UTF8&qid=1378067410&sr=1-1&keywords=it+ultra+lightweight+luggage

- OR (instead of either IT bag described above), my new Eagle Creek Lync® 22-inch case which converts to a backpack if desired (but not for me).
- Not as light as the IT bags, but lighter than pretty much everything else.
- Does not hold the same as "full 22-inch" cases.
- Made of tougher fabric and zipper than the IT bags (which I still love).
- The backpack straps AND the wheels can come off to collapse it and store in it's own sack.
- For 2016, this will be my carry on bag, hopefully not overloaded. It's wheels will remain in place. Backpack straps will stay at home.
- My "Purse" or "personal item" (a backpack on a plane, a large "tote" in the car).
- If I want to take a purse on the trip that won't go into the tote or backpack, I stuff things in it and pack it in my case.
- Then I use various little mesh bags to hold the purse contents in the backpack.
- If appropriate, I may put those things into a small cube.
- Also--for flying, my Kindle, camera, jacket (planes can be cold), back cushion, neck cushion, food, and anything else that I might want "in flight"
- Important consideration--if your backpack is going to pass as your "purse", it must not be too large or they will tell you you have two carry ons, and you may have to put one of them into the Hold. Some airports have frames it must fit in like the ones for carry ons, only smaller.
Packing Your Cubes is now a separate post. Please see "Packing Your Cubes..." or click: http://nana-bs-super-travel-packing-tips.blogspot.com/2016/05/packing-in-cubes-down-and-tidy-part-of.html
Organize and Minimize Your Stuff!
One of my new "ultimate" luggage reduction tricks for very long trips is a "clothing rack" to begin hanging items on days or weeks in advance. (My current closet is too tiny to use for this purpose.)
- Using a rack is truly helpful in the planning stage--you will see what items you actually need to purchase and what you really do not need.
- For big trips I put my rack up a couple of months before time to leave. Then I grab anything I need to wear and put it back when it's clean.
- As the time grows closer, you can easily look at the row of things, count how many in each category, see how much excess you have, and eliminate some stuff.
- The very first time I did this, it was very clear that I did not need to take 12 short sleeve tops! Yes, that's 12. So, as silly as it may seem, I do actually COUNT them.
- Also, I had gotten very frustrated with bringing cases home with stacks of things I had not worn.
- The refinement of my layering system has also been a major help in reducing excess garments.
When it is time to pack, Lay out (or group on a rod or rack) all your tops, bottoms, undies, etc. in groups of similar items. Also get out your collection of cubes and bags for easy grabbing while packing.
Follow the folding and packing directions in "Packing in Cubes..." http://nana-bs-super-travel-packing-tips.blogspot.com/2016/05/packing-in-cubes-down-and-tidy-part-of.html.
Summary: Before putting the cubes into your case, put smaller bags, cubes, or items in between the rails in the bottom of your case to create a flat surface.
- Important step!
- BEFORE beginning, retrieve the four straps of your case (sometimes they have a piece of fabric or mesh stitched between them to create a "lid") meant for holding the contents of your case in place.
- Clip a clothespin or something to each strap so they do not fall back down inside the case and hide as you pack.
- They are integral to your "compression" efforts before you close your case.
- Create a rather "flat" surface on the bottom by filling in the spaces between the rails, as mentioned elsewhere.
- This will keep your clothes tidier than if you have them sitting in a lumpy place.
- Begin putting cubes into place.
- As you pack your top layer of cubes, consider your remaining items--smaller mesh bags, shoes, etc.
- You may need to leave a taller space on one half of the bag to accommodate some of these items.
- Relatively flat things can go in the rounded edges between your cubes and the edges of the case, as well as in between stacks of cubes.
- Flat shoes can sometimes be wedged in between cube stacks or laid face down on the top.
- Use one of the shower caps from hotels as a "cosy" for each shoe to keep dirt away from the rest of your case. (Collect them as you travel!)
- Bulkier items may need to go on one side so they fit, then put one less cube on that side of your case.
- Once you have everything in the case, pull the four straps into place over everything in the bag and cinch them very tightly.
- Do not worry about the straps creasing what is in the cubes. The contents of well-packed and placed cubes survive well.
- Put any cube with sensitive items in the lower part of the case so it will not be adversely affected by cinching.
- I like to put my Sleeping cube on the top for quick retrieval at the other end of the journey.
- Now COMPRESS your case and zip it closed--you are DONE!
- Another tip: I travel with a Travelon Micro Scales® on plane trips--at 3 ounces and inexpensive, it takes up no space or weight and everyone else wants to borrow it when packing!


- Note: when using my 16 or 18-in. cases, I shove the cube in slightly so it fits, and it still keeps things quite tidy (because I pack the cube well).
- Note for Backpackers to consider: My family uses various little stuff sacks when they are backpacking. For the same purpose I use cubes, etc.
- For an expedition when ounces count, stuff sacks are somewhat lighter weight than cubes.
- They keep things organized and compressed.
- Most are not see-through.
- None of them provide easy access to all items.
- None are easily organized and repacked once you have to empty them for retrieving a single garment.
- I see my family struggling to find and extract their stuff.
- I see them basically starting from scratch with re-packing.
- For myself, I will use cubes for backpacking as well. They cram into my backpack quite nicely.
- But I have to confess that I do not do long backpacking trips.
- If I did, I would probably get some of the Eagle Creek Specter® series bags. In spite of their shortcoming--they would still be far better than stuff sacks.
- I am going to do a short blog detailing why they do not work well for me.
For a trip when you are driving up to 5 days to reach a destination, you can minimize your time and effort along the way by putting everything you will need until you get to your 'stopping point' in one case.
- In this case, I use whatever case has my CPAP and everything else goes in with it.
- If it won't fit, hold out one regular cube and throw it into the car with the CPAP case.
- Use your cubes slightly differently for this part of your trip.
- Put enough of tops and bottoms into two regular cubes to get through all the driving days.
- Put in enough undies and essential toiletries
- You will only have to take one case into your hotel each night.
- If you need to take all of them for security reasons, you only roll them in and out again--you only have to open the one bag.
- Set aside your dirty clothes and begin to fill one cube, putting the remaining clean clothes into the other one.
- When you arrive, collect the family's dirty clothes cubes and do some laundry--easy-peazey!
- If you are staying in one place for some days, it is an opportunity to organize for the next leg of your journey.
- In your hotel, open the cubes and use them either in your case or in the hotel drawers, as "drawers".
- All your clothes will stay nicely folded, organized, and easily accessible.
- Packing to go to your next location will be very easy as well--just remember to separate the dirty clothes into their own cube.
- Clean things will already be organized because you will have repacked them in the cubes properly as you fold laundry.
Follow a similar tip when you are going home--your return to "nomal life" will be so much easier!
- Put all dirty clothes into cube(s); all clean clothes into other cube(s).
- When you get home, sort the dirty clothes as you remove them from the cubes, and in no time you can put away all your toiletries, clean clothes, and other items.
- Do the laundry and you are done!
I do not recommend that anyone go out and purchase ALL these items at one time. I have accumulated mine over several years as I have worked out what works best for me.
- I have made a very few unnecessary investments, but I've been careful and have "wasted" very little in experimenting with options.
- There have been some experiments that did not work out,
I suggest you start with these basics: 3 "regular" and 1 "small" cubes. See how those work out for you, and add other sizes and shapes as you figure out what suits your "style".
- OR, just buy one and pack things in an orderly way to see how that works for you. (I started that way. They were sufficiently costly that I did not want to make an investment until I tried one.)
Miscellany:
- My daughters have mostly picked up my better envelope mesh bags at various small stores over time; they charge a ridiculous amount for these bags. They have purchased a few I thought I'd never use, but most of them have eventually come in handy.
- I have gotten a few little softer-types at drugstores and recently I even picked up a some in the "back to school" supplies at an office supply store.
- If I find them really cheap, I get a few because I know how difficult to find and overpriced the better quality ones are.
- The best ones, of course, all came from one store that no longer carries them. As far as I can find, no one else does either.
- I have the equipment to do it with, so I have even tried to find the good mesh fabric to make my own, but have not been successful.
- On the subject of purchases, I have added to my trip supplies some "Go Toobs®" in two sizes. It is important to take "enough", but not too much of all those personal care items (unless you are one of those people who prefer to shop when you arrive or do not have sensitive skin and can use hotel toiletries wherever you go). These have been pretty successful.
- Note: They are not the best for very extended trips. Then (if you are like me and too sensitive to risk other products while travelling), you take larger bottles in your checked cases.
- I put the tubes into a clear plastic cosmetic bag from the drugstore just in case of leaks, but I leave at least a half inch of head space at the top and squeeze the liquid to the top before attaching the lid.
- If I have any doubts about runnier items, I put each tube into a snack-size Ziploc baggie. I am constantly amazed at the messes I have avoided when one leaks into the snack bag!
- This isn't what I have for the Toobs, but it is sort of similar:
==============================================
For all the nay-sayers who don't want to take the extra few minutes to pack in this way, I say "don't bother", but don't snort, pooh-pooh, or say silly things to those who find it makes a difference.
- And we will try not to be rude and describe the inside of some luggage as 'looking like someone stood back and threw their things in from a distance', or that the case has 'vomited clothing' and everything else when it is opened.
- We will also try not to tell "tidy packers" how much easier life is with cubes!
======
For truly light packing, I suggest you incorporate suggestions in Rick Steve's blog post: http://www.ricksteves.com/plan/tips/pack-light.htm. Packing in cubes meshes very nicely with the true minimalist approach to travel.
- I have a few of his cubes, but I do not prefer them. They are too deep and the sides are too floppy for my system. Possibly they work better with his luggage.
- Unfortunately, I cannot write authoritatively without testing pretty much everything.
Clearly you are going to need to say "no" to many items on the TravelSmith list if you are going to follow Rick Steve's guidelines. However, the list should be useful in reminding you of items which may be essential to you.
I have developed an online Document for my own travel preparation. For each trip I copy from a similar trip and create a new document for that specific trip. Over time I have developed a very comprehensive list--one that is invaluable when I need to drastically minimize items. (I have just been through that process for 2016 trip and it made a big difference in the bulk.)
It is also of great value in reminding me of things I really do not want to be without and things which I can omit in my current strategy.
- When I return from a trip, I go back to the Document and note in red comments on what was useful, what wasn't, what I had too much or too little of, etc. These notes are immensely useful when another trip comes along.
===========
Lest it appear otherwise, neither Eagle Creek®, Amazon, nor any other manufacturer or supplier contributes ANYTHING to me! I mention brands and sources so people do not have to write and ask 'what brand was that?' And 'where did you find it?'
2016 - new year! I am trying out some new things for upcoming very extended trip to England/Scotland/Wales. One will be my new 22-inch ecLYNC System Ultra-Light & Durable Luggage/Backpack. (I got mine on sale at REI for MUCH less.) For my purposes I could do without the backpack feature--it is too large and I have to have a properly-framed backpack for my back issues. You can leave the backpack straps at home.
ReplyDeleteI may take my IT luggage as well, or my new lighter weight "regular" case., but I do not yet know how it will pan out--I have to have boots, backpack, etc. (But I will not be using the Eagle Creek as a backpack--it's too large.)
Also considering Z1 CPAP.
I will re-post with details when I have determined exactly what I'm going to use. Or I will write a second post in here if appropriate.